1800 287 223 · [email protected]
2D to 3D Conversion

The demand for 2D to 3D conversion is growing rapidly across industries, from architecture to manufacturing. Converting 2D drawings into accurate 3D models is essential for enhancing visualisation, improving design accuracy, and streamlining production. However, even experienced professionals can encounter challenges that may hinder the conversion process. To help you achieve flawless results, we’ve compiled expert tips on how to avoid common pitfalls in 2D to 3D conversion services.

2D to 3D Conversion Service

1. Misinterpreting 2D Data

One of the most frequent mistakes during 2D to 3D conversion is misinterpreting the 2D drawings. In 2D designs, some features may be implied through symbols or lines that don’t translate directly into a 3D model. Ensuring a thorough understanding of the 2D blueprint is critical before conversion.

Tip: Carefully review all 2D documentation and engage with the designer or client to clarify ambiguous areas. If necessary, annotate the 2D drawings with notes on how specific details should be modelled in 3D.

2. Overlooking Scale and Proportions

A lack of attention to scale and proportions during the conversion process can lead to major inaccuracies in the 3D model. Misalignment between the 2D design’s scale and the intended real-world dimensions can result in significant rework.

Tip: Verify that the scale in the original 2D drawing is accurate and consistent throughout the design. During the conversion process, ensure that the proportions remain true to the original scale. This is particularly important for complex projects like architectural designs or precision engineering models.

3. Choosing the Wrong Software

The choice of software for 2D to 3D conversion services plays a crucial role in the accuracy and efficiency of the conversion process. Using incompatible or outdated software can introduce errors and slow down the workflow.

Tip: Select specialised software tailored to your industry’s needs, whether it’s AutoCAD, SolidWorks, Revit, or another platform. Ensure that your software supports seamless integration of 2D and 3D elements. Regularly update your tools to take advantage of the latest features.

4. Failing to Optimise Geometry

Converting a 2D drawing into a 3D model without optimising the geometry can lead to excessive detail or unnecessary complexity in the final model. Overly complex geometry can cause file size issues and complicate manufacturing processes.

Tip: Simplify the geometry wherever possible while maintaining accuracy. Remove redundant details that do not contribute to the functionality or aesthetic of the final 3D model. Streamlining the design can lead to faster rendering and easier modification.

5. Ignoring Design Intent

A common pitfall is focusing solely on the technical conversion of 2D to 3D while overlooking the overall design intent. Misinterpreting how the 3D model should look or function can lead to a final product that doesn’t align with the project’s objectives.

Tip: Always keep the design intent in mind during the conversion process. Collaborate with stakeholders to ensure that the final 3D model meets the design’s functional and aesthetic goals.

6. Lack of Collaboration with Experts

Attempting to handle 2D to 3D conversion without the guidance of skilled professionals can result in costly errors. Conversion requires a combination of technical expertise, industry-specific knowledge, and precision.

Tip: Work with experienced 2D to 3D conversion services to ensure that the process is handled efficiently and accurately. Professional services can offer valuable insights, reduce conversion time, and eliminate errors that may arise from misinterpretation.

Conclusion

Avoiding these common pitfalls in 2D to 3D conversion can help you achieve flawless results and enhance the overall quality of your projects. By paying attention to detail, selecting the right software, and collaborating with experts, you can streamline the conversion process and produce accurate, functional 3D models. When in doubt, partnering with a reliable 2D to 3D conversion service like ASTCAD can ensure that your project is in capable hands, delivering exceptional outcomes with minimal hassle.

What is the process of 2D to 3D image processing?

The process of 2D to 3D image processing involves converting a flat, two-dimensional image into a three-dimensional representation. This is used in various fields such as medical imaging, animation, gaming, architecture, and more. The process typically follows these steps:

1. Image Collection
The first step is gathering the necessary 2D images, drawings, or scans that will be used for conversion. These could be technical drawings, photos, or medical scans (like MRIs or CTs), depending on the application.

2. Image Preprocessing
Before conversion, the 2D images are cleaned up and optimized for better accuracy in the 3D model. This might include:
Enhancing contrast or brightness to highlight features.
Noise reduction to remove unwanted artifacts.
Edge detection to define boundaries and contours more clearly.
This step ensures the image quality is sufficient for accurate 3D rendering.

What is 3D image processing techniques?

3D image processing techniques involve methods and algorithms that analyze, manipulate, and enhance 3D images or data to extract valuable information or create detailed visual representations. These techniques are widely used in fields such as medical imaging, computer vision, virtual reality, robotics, and scientific research. Below are the key techniques involved in 3D image processing:

1. 3D Reconstruction
This technique converts 2D images or slices into a 3D model by estimating depth and structure. It’s often used in medical imaging (like CT and MRI scans) or computer vision. Common methods include:
Stereoscopic reconstruction: Using two images from different viewpoints to build a 3D model.
Shape-from-shading: Infers depth from lighting and shading in a single 2D image.
Photogrammetry: Creates 3D models from a series of photographs taken from different angles.

2. Point Cloud Processing
A point cloud is a set of data points in 3D space representing the external surface of an object. Processing point clouds involves:
Registration: Aligning multiple point clouds from different angles or positions into a unified coordinate system.
Downsampling: Reducing the number of points while maintaining the object’s shape to optimize processing.
Segmentation: Identifying and separating meaningful parts of the object from the point cloud.
CS

Claire Sutton

Architectural CAD Specialist & Technical Writer · BArch (Hons), QUT · ASTCAD, Brisbane

Claire has 10 years of experience in Revit BIM modelling, architectural documentation, and CAD conversion projects across Southeast Queensland and NSW. She has delivered NCC-compliant documentation for residential, commercial, and industrial facilities.

More articles by Claire Sutton →
3D Mechanical Animations

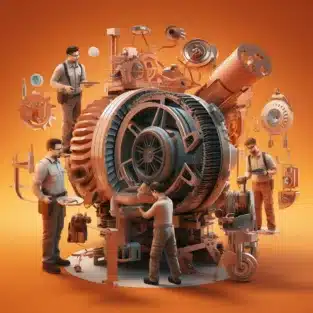
Incorporating CAD data into 3D mechanical animations is a powerful way to visualise complex mechanical designs, improve communication between teams, and create compelling presentations for clients. The process combines detailed CAD models with dynamic 3D animations to simulate real-world operations, enhance product development, and streamline design processes. If you’re working with CAD files and want to bring them to life through animations, here are some essential tips and tricks to ensure smooth integration.

3D Mechanical Animations

Understanding the Role of 3D Mechanical Animations

3D mechanical animations are crucial in illustrating how mechanical systems work. They allow engineers, designers, and stakeholders to see the movement, function, and interaction of components in real-time. These animations can showcase the assembly process, simulate operational conditions, and highlight potential design flaws before manufacturing. Using CAD data for these animations ensures that the model is based on precise, real-world measurements and specifications.

However, transitioning from CAD to animation requires specific knowledge and expertise. Without proper handling, CAD data may lose its accuracy or fail to convey the intended mechanical function. Below are some tips and tricks to help you achieve seamless integration of CAD data into 3D mechanical animations.

1. Choose the Right CAD Format

Before you begin animating, ensure your CAD data is in a format that is compatible with the animation software you’re using. Many animation tools, like Blender, Autodesk Maya, or Cinema 4D, accept formats like IGES, STEP, and STL. These formats preserve the integrity of your 3D models, ensuring that details, measurements, and design elements remain intact during the conversion process.

  • Tip: Export the CAD model in a neutral format like STEP, which ensures a smoother transfer of geometry without compromising the details.

2. Optimise CAD Models for Animation

CAD models are often highly detailed, containing information not necessary for animation, such as excessive internal components or manufacturing details. To avoid overwhelming the animation software and slowing down the rendering process, simplify and clean up the model. Remove unnecessary parts, such as hidden geometries or bolts and fasteners, which won’t be visible in the animation.

  • Tip: Use decimation or retopology tools to reduce the poly count of your CAD model while retaining the necessary details for animation. This will also speed up rendering times.

3. Segment the Model for Better Control

When animating mechanical systems, it’s essential to have control over each part’s movement. Segment the CAD model into separate components so that you can animate them independently. For example, in an engine animation, separate the pistons, crankshaft, and connecting rods to simulate their individual movements.

  • Trick: Group related parts that move together as a single object for more straightforward animation control. This technique reduces the complexity of managing dozens of parts individually while ensuring accuracy in movement.

4. Apply Rigging for Realistic Movement

Once your CAD model is optimised and segmented, it’s time to apply rigging. Rigging is the process of creating a skeletal structure for the model, enabling it to move in a realistic manner. For mechanical animations, this often involves setting constraints on parts to ensure they move within defined limits, such as rotational or linear motion.

  • Tip: Use inverse kinematics (IK) for mechanical systems with connected components, such as robotic arms or linkages. IK ensures that movement at one end of the system correctly influences the entire chain of components.

5. Use Physics Simulations for Realistic Interactions

For highly accurate mechanical animations, integrating physics simulations can bring an extra layer of realism. Physics engines in animation software can simulate gravity, friction, and collisions, which are essential when animating complex mechanical systems. This feature is particularly useful in demonstrating how a product will perform under different conditions or showcasing interactions between parts.

  • Trick: Adjust physics properties such as mass, material, and friction to simulate real-world behaviour. This can significantly enhance the credibility of your animation, especially in scenarios where interaction between components is critical.

6. Leverage Keyframes for Smooth Animation

Keyframing is an essential technique in animation that involves setting specific points of movement at certain frames. By establishing keyframes at critical points in your animation, you can control the timing and pace of how the mechanical parts move. This ensures smooth transitions and accurate depictions of how the system works.

  • Tip: For mechanical systems, focus on using keyframes at moments of key mechanical transitions, such as when a valve opens or a piston reaches the top dead center. This allows for precise control over the operation sequence.

7. Add Textures and Materials for Realism

CAD data often lacks the visual aesthetics required for realistic animations. Applying textures and materials to your CAD model enhances its visual appeal and simulates how the mechanical parts will look in real life. Materials like metal, plastic, and rubber can be applied to different parts to differentiate components and give the viewer a clear understanding of the product’s composition.

  • Trick: Use procedural textures that are easy to adjust and apply across multiple parts. This ensures consistency in material appearance, even as you make changes to the model.

8. Ensure Proper Lighting and Rendering

Lighting plays a crucial role in the final appearance of your animation. It highlights the model’s details, materials, and overall movement. When animating mechanical systems, proper lighting can draw attention to specific components or actions. After setting up the lighting, ensure that your rendering settings are optimised to capture all the intricate details of your CAD model.

  • Tip: Use ambient occlusion and shadow rendering techniques to add depth and realism to your animation. These effects create natural-looking shadows that enhance the 3D appearance of your mechanical model.

9. Test and Refine the Animation

Before finalising your animation, test it thoroughly to ensure that all parts move as expected and that the mechanical interactions are accurate. Watch the animation from multiple angles and fine-tune the keyframes, rigging, and physics properties as needed.

  • Tip: Break the animation into shorter segments for easier testing. This allows you to isolate and address any issues more efficiently.

Conclusion

Incorporating CAD data into 3D mechanical animations requires careful preparation and attention to detail. By optimising your models, applying rigging, leveraging physics simulations, and testing thoroughly, you can create animations that not only look stunning but also convey accurate mechanical functionality. These tips and tricks will help you deliver high-quality animations that are both visually compelling and technically precise, ensuring that your 3D mechanical animations stand out.

For more information on how we can help you bring your mechanical designs to life, contact our 3D Mechanical Animations Service team at ASTCAD.


JH

James Hartley

Senior Mechanical Engineer · BEng (Mechanical), UQ · Member, Engineers Australia · ASTCAD, Brisbane

James has 14 years of hands-on experience delivering CAD design, structural drafting, and engineering documentation across Australia’s mining, oil & gas, and manufacturing sectors. He specialises in SolidWorks, Autodesk Inventor, and AutoCAD for complex multi-discipline projects.

More articles by James Hartley →
3D part modelling

In the rapidly evolving world of design and engineering, 3D part modelling stands out as a crucial skill for creating detailed and precise components. Whether you’re new to the field or seeking to refine your skills, mastering 3D part modelling can open up a plethora of opportunities. This guide offers valuable tips and tricks for beginners to help you get started with 3D part modelling, particularly if you’re considering leveraging 3D part modelling services.

3D Part Modelling Service

Understanding 3D Part Modelling

Before diving into tips and tricks, it’s essential to understand what 3D part modelling entails. At its core, 3D part modelling is the process of creating a digital representation of a physical component using specialised software. This digital model can be used for simulations, visualisations, or as a basis for manufacturing processes like 3D printing.

Tip 1: Start with the Basics

As a beginner, it’s crucial to build a strong foundation. Familiarize yourself with basic 3D modelling concepts such as vertices, edges, and faces. These are the building blocks of any 3D model. Understanding how to manipulate these elements will allow you to create more complex shapes and designs.

Recommended Software: Consider starting with user-friendly software like Tinkercad or Fusion 360. These platforms offer intuitive interfaces and extensive tutorials that can ease you into the world of 3D modelling.

Tip 2: Utilise Online Resources and Tutorials

The internet is a treasure trove of tutorials, courses, and forums dedicated to 3D part modelling. Websites like YouTube, Coursera, and Udemy offer step-by-step guides tailored to various skill levels. Engaging with these resources will accelerate your learning curve and introduce you to advanced techniques and industry practices.

Pro Tip: Join online communities or forums related to 3D part modelling. Platforms such as Reddit’s r/3Dmodeling or dedicated Discord servers can provide support, feedback, and inspiration from fellow modellers.

Tip 3: Practice Regularly

Like any skill, proficiency in 3D part modelling comes with practice. Set aside time each week to work on different projects. Start with simple models and gradually increase complexity as your confidence grows. Practising regularly will help you become more comfortable with the tools and techniques used in 3D modelling.

Challenge Yourself: Try to replicate existing objects or create custom designs based on real-world components. This approach helps you understand practical applications and refine your modelling skills.

Tip 4: Learn the Importance of Precision

In 3D part modelling, precision is key. Pay attention to dimensions, tolerances, and geometric accuracy. Many software tools offer features to help you measure and align parts accurately. Developing a habit of checking your work ensures that the final model meets the required specifications and functions as intended.

Helpful Feature: Most 3D modelling software includes a measurement tool or grid system. Utilise these tools to maintain precision throughout your design process.

Tip 5: Explore Advanced Techniques Gradually

Once you’re comfortable with the basics, start exploring more advanced techniques. Learn about parametric modelling, where dimensions and constraints define the shape, or delve into surface modelling for more complex geometries. Gradually incorporating these techniques will enhance your ability to create sophisticated and functional 3D models.

Resource Recommendation: Books or online courses focused on advanced 3D modelling techniques can provide deeper insights and practical examples.

Tip 6: Understand File Formats and Compatibility

Different 3D part modelling services and applications use various file formats. Familiarize yourself with common formats like STL, OBJ, and STEP. Understanding these formats is essential for ensuring compatibility between your models and the services or software you’re using.

Best Practice: Always check the requirements of the 3D part modelling service you plan to use. Ensuring that your file format aligns with their specifications can prevent potential issues during the modelling or manufacturing process.

Tip 7: Collaborate and Seek Feedback

Collaboration is a valuable aspect of 3D part modelling. Share your work with peers or mentors to receive constructive feedback. Participating in collaborative projects or seeking advice from more experienced modellers can provide new perspectives and improve your skills.

Networking Tip: Attend local or online 3D modelling meetups and workshops to connect with others in the field. Networking can lead to valuable learning experiences and professional opportunities.

Conclusion

Mastering 3D part modelling requires patience, practice, and a willingness to learn. By starting with the basics, utilising available resources, and practising regularly, you can build a solid foundation. Exploring advanced techniques, understanding file formats, and seeking feedback will further enhance your skills.

If you’re considering using professional 3D part modelling services, applying these tips will ensure that you can communicate your needs effectively and collaborate efficiently with service providers. With dedication and perseverance, you’ll find yourself adept at creating precise and impressive 3D models that can bring your ideas to life. Happy modelling!


JH

James Hartley

Senior Mechanical Engineer · BEng (Mechanical), UQ · Member, Engineers Australia · ASTCAD, Brisbane

James has 14 years of hands-on experience delivering CAD design, structural drafting, and engineering documentation across Australia’s mining, oil & gas, and manufacturing sectors. He specialises in SolidWorks, Autodesk Inventor, and AutoCAD for complex multi-discipline projects.

More articles by James Hartley →
Structural 2D and 3D Drafting

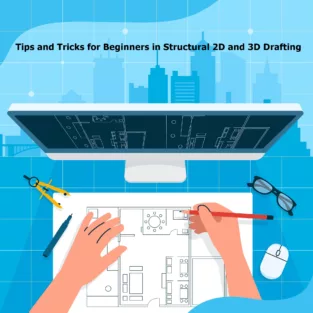
Structural 2D and 3D drafting are essential components of the engineering and construction industries. These techniques allow for the precise visualisation, planning, and execution of various structural projects. For beginners venturing into this field, understanding the fundamentals and mastering essential tips and tricks can significantly enhance your efficiency and accuracy. Here’s a comprehensive guide to help you get started.

Understanding the Basics

Before diving into tips and tricks, it’s crucial to grasp the basics of structural 2D and 3D drafting.

  1. Structural 2D Drafting: This involves creating flat representations of structures, such as floor plans, elevations, and sections. It’s essential for detailing and documenting construction projects.
  2. Structural 3D Drafting: This technique provides a three-dimensional representation of structures, allowing for better visualisation and analysis. It’s particularly useful for complex projects and steel structure drawings.

Essential Tips for Structural 2D Drafting

1. Master the Tools

  • Familiarize with CAD Software: Get comfortable with popular CAD software like AutoCAD, Revit, or MicroStation. Understanding the interface, commands, and shortcuts can save time and reduce errors.
  • Use Layers Effectively: Organise your drawings by using layers for different elements (e.g., walls, beams, annotations). This makes editing easier and enhances clarity.

2. Precision and Accuracy

  • Snap and Grid Settings: Utilise snap and grid settings to ensure precise placement of elements. This is crucial for maintaining accuracy in your drawings.
  • Dimensioning: Always double-check dimensions and annotations. Accurate dimensioning is vital for shop drawings and ensuring that the design can be built correctly.

3. Standardisation

  • Adopt Industry Standards: Follow industry standards and best practices for drafting. This ensures consistency and makes your drawings easily understandable by other professionals.
  • Templates and Blocks: Create or use standard templates and blocks for repetitive elements. This not only saves time but also maintains consistency across your drawings.

Essential Tips for Structural 3D Drafting

1. Start with a Solid Foundation

  • Understand the Project Requirements: Before starting any 3D model, thoroughly understand the project requirements and specifications. This helps in creating accurate and relevant models.
  • Plan Your Model: Break down the project into manageable parts and plan your modelling approach. This prevents confusion and ensures a systematic workflow.

2. Leverage Technology

  • Use BIM Software: Building Information Modelling (BIM) software like Revit or Tekla Structures is invaluable for 3D drafting. These tools enhance collaboration and provide detailed information about the structural components.
  • Automation Tools: Utilise automation tools and scripts to streamline repetitive tasks. This can significantly boost productivity and reduce manual errors.

3. Visualisation and Analysis

  • Rendering: Use rendering tools to create realistic visualisations of your models. This helps in identifying potential issues and presenting the design to stakeholders.
  • Clash Detection: Conduct clash detection to identify and resolve conflicts between different structural elements. This is especially important for steel structure drawings to ensure seamless integration.

Tips for Both 2D and 3D Drafting

1. Continuous Learning

  • Stay Updated: The field of structural drafting is constantly evolving with new technologies and practices. Stay updated through online courses, webinars, and industry publications.
  • Learn from Others: Join professional forums and communities. Engaging with other professionals can provide valuable insights and tips.

2. Attention to Detail

  • Review and Revise: Always review your work for errors and inconsistencies. Regular revisions ensure that your drawings are accurate and up to date.
  • Document Everything: Maintain detailed documentation of your work processes and decisions. This is helpful for future reference and ensures transparency.

3. Collaboration and Communication

  • Work with Teams: Structural drafting often involves collaboration with other engineers, architects, and contractors. Effective communication and teamwork are crucial for successful project execution.
  • Use Collaboration Tools: Utilise collaboration tools like BIM 360 or Navisworks to share and manage your models. These tools facilitate real-time collaboration and project management.

Conclusion

Structural 2D and 3D drafting are critical skills for any aspiring engineer or draftsman. By mastering the tools, adhering to industry standards, and continuously learning, you can enhance your drafting skills and contribute effectively to any structural project. Whether you’re working on shop drawings or steel structure drawings, these tips and tricks will help you achieve precision and efficiency in your work. Embrace the technology, stay detail-oriented, and always be open to learning and collaboration.

By following these guidelines, beginners can build a strong foundation in structural drafting and set themselves up for a successful career in this dynamic field.

What is 2D vs 3D drawings in construction?

In construction, 2D and 3D drawings serve distinct but complementary purposes, each contributing to different stages of the project lifecycle. Understanding the differences between these types of drawings is essential for effective planning, design, and execution of construction projects.

2D Drawings
Definition: 2D drawings are flat, two-dimensional representations of a structure. They provide detailed views and specifications of the various components of a building or construction project.

Types of 2D Drawings:
Plans: Horizontal views of a structure, typically showing the layout of a floor or site.
Elevations: Vertical views of the exterior or interior faces of a structure.
Sections: Cutaway views that show internal details along a specific plane.
Details: Enlarged views of specific parts of the design, providing intricate details about construction elements.

Purpose:
Documentation: Provides precise measurements, dimensions, and notes necessary for construction.
Communication: Serves as a common language among architects, engineers, contractors, and other stakeholders.
Regulation Compliance: Ensures that the design meets local building codes and regulations.

Advantages:
Simplicity: Easier to create and interpret for basic designs and straightforward projects.
Standardization: Widely used and understood in the industry with standardized symbols and notations.

3D Drawings
Definition: 3D drawings are three-dimensional representations of a structure, providing a more realistic and comprehensive view of the project. They are often created using Building Information Modeling (BIM) software.

Types of 3D Drawings:
Models: Full three-dimensional representations of the entire structure.
Renderings: Photorealistic images of the model, often used for presentations and visualizations.
Walkthroughs: Animated sequences that simulate walking through the structure, providing an immersive experience.

Purpose:
Visualization: Helps stakeholders understand the spatial relationships and aesthetics of the project.
Clash Detection: Identifies conflicts between different building systems (e.g., structural, mechanical, electrical) before construction begins.
Coordination: Facilitates collaboration among various disciplines by integrating all aspects of the design into a single model.

Advantages:
Enhanced Understanding: Provides a clear and detailed visualization, making it easier to understand complex designs.
Improved Accuracy: Reduces errors and omissions by allowing for comprehensive reviews and modifications.
Efficiency: Speeds up the design process by enabling simultaneous updates and real-time collaboration.

How to make 2D drawing from 3D?

Creating a 2D drawing from a 3D model is a common task in CAD software. Here’s a step-by-step guide to help you through the process:
Step-by-Step Guide
1. Prepare Your 3D Model
Ensure your 3D model is complete and error-free.
Check for any issues with geometry, such as holes or overlaps.
2. Open Your CAD Software
Use CAD software that supports both 3D modeling and 2D drawing, such as AutoCAD, SolidWorks, or Fusion 360.
3. Set Up Your Workspace
Open a new drawing file or start a new 2D drawing project within your CAD software.
4. Orient the 3D Model
Rotate and position your 3D model to the desired views (e.g., top, front, side, isometric).
You can create different views for different parts of your 2D drawing.
5. Create the 2D Views
Use the ‘Base View’ or ‘Standard View’ tool in your CAD software to generate 2D views from the 3D model.
Typically, you can select from standard views like top, front, right side, and isometric.


JH

James Hartley

Senior Mechanical Engineer · BEng (Mechanical), UQ · Member, Engineers Australia · ASTCAD, Brisbane

James has 14 years of hands-on experience delivering CAD design, structural drafting, and engineering documentation across Australia’s mining, oil & gas, and manufacturing sectors. He specialises in SolidWorks, Autodesk Inventor, and AutoCAD for complex multi-discipline projects.

More articles by James Hartley →
CAD Conversion Service

In today’s digital age, CAD conversion services have become an essential component for industries ranging from architecture and engineering to manufacturing and construction. Choosing the right CAD conversion service can be a daunting task, given the myriad options available. This guide will help you navigate through the process of selecting a CAD conversion service that best suits your needs.

Understanding CAD Conversion Services

CAD conversion services involve the transformation of paper drawings, PDFs, or other digital formats into precise and editable CAD files. These services are crucial for maintaining accuracy, improving collaboration, and enhancing productivity in various projects. By outsourcing CAD conversion, businesses can focus on their core competencies while ensuring that their design data is accurately digitised.

Key Factors to Consider

When choosing a CAD conversion service, several factors need to be considered to ensure you get the best value for your investment.

  1. Accuracy and Precision: The primary goal of CAD conversion is to achieve high accuracy and precision in the converted files. Look for a service provider with a proven track record of delivering error-free conversions. Check for testimonials, case studies, and client reviews to gauge their reliability.
  2. Experience and Expertise: Experience matters significantly in CAD conversion services. Companies with extensive experience are more likely to understand the nuances of different industries and the specific requirements of your projects. Ensure that the service provider has expertise in the type of conversion you need, whether it’s architectural, mechanical, or civil engineering drawings.
  3. Technology and Tools: Advanced technology and tools are vital for efficient CAD conversion. Ensure that the service provider uses the latest CAD software and conversion tools. This not only ensures high-quality output but also faster turnaround times. Additionally, inquire about their data security measures to safeguard your sensitive design information.
  4. Customisation and Flexibility: Every project is unique, and so are its CAD conversion requirements. A good service provider should offer customizable solutions tailored to your specific needs. Whether you need conversions in specific file formats or require particular details to be highlighted, the ability to customise is crucial.
  5. Turnaround Time: Time is often a critical factor in project completion. Discuss the turnaround time with potential service providers to ensure they can meet your deadlines. Reliable CAD conversion services should be able to provide quick yet accurate conversions without compromising on quality.
  6. Cost-effectiveness: While quality should never be compromised, cost-effectiveness is also a significant factor. Compare the pricing structures of different service providers and look for a balance between quality and affordability. Be cautious of extremely low prices, as they may indicate subpar quality or hidden costs.
  7. Customer Support: Efficient customer support is essential for addressing any issues that may arise during the conversion process. Choose a service provider that offers robust customer support, including easy communication channels, quick response times, and knowledgeable support staff.
  8. Reputation and Reviews: A service provider’s reputation in the industry can give you insights into their reliability and quality of work. Look for reviews and ratings on independent platforms and ask for references from previous clients. A reputable company will have positive feedback and a solid client base.

Steps to Selecting the Right CAD Conversion Service

  1. Define Your Requirements: Clearly outline your CAD conversion needs, including the type of drawings, required file formats, and any specific details. This will help you communicate your expectations to potential service providers.
  2. Research and Shortlist: Conduct thorough research to identify potential CAD conversion service providers. Shortlist a few based on their experience, technology, and reviews.
  3. Request Samples: Ask for sample conversions to evaluate the quality of their work. This will give you a firsthand look at their precision and attention to detail.
  4. Evaluate Proposals: Compare the proposals from different service providers, considering factors like cost, turnaround time, and customisation options.
  5. Check References: Contact references provided by the service providers to get insights into their reliability and quality of work.
  6. Make an Informed Decision: Based on your evaluation, choose the CAD conversion service that best aligns with your requirements and budget.

Conclusion

Choosing the right CAD conversion service is crucial for the success of your projects. By considering factors such as accuracy, experience, technology, customisation, turnaround time, cost-effectiveness, customer support, and reputation, you can make an informed decision. Remember, the right service provider will not only meet your conversion needs but also contribute to the overall efficiency and success of your projects.

Investing time in selecting the right CAD conversion service will pay off in the long run, ensuring that your design data is accurately and efficiently digitised, allowing you to focus on what you do best—bringing your projects to life.


CS

Claire Sutton

Architectural CAD Specialist & Technical Writer · BArch (Hons), QUT · ASTCAD, Brisbane

Claire has 10 years of experience in Revit BIM modelling, architectural documentation, and CAD conversion projects across Southeast Queensland and NSW. She has delivered NCC-compliant documentation for residential, commercial, and industrial facilities.

More articles by Claire Sutton →
Architectural CAD Drafting

In the ever-evolving world of architecture, precision, efficiency, and innovation are key. As the demands of modern construction projects grow, so does the need for advanced tools and services that can meet these demands. Enter architectural CAD drafting services – the backbone of contemporary architectural design and construction.

What is CAD Drafting?

(CAD) drafting is the process of creating detailed and precise digital representations of architectural designs. These drawings are used by architects, engineers, and construction professionals to visualise and plan structures before they are built. CAD drafting replaces traditional hand-drawn methods, offering a range of advantages that have revolutionized the field.

The Role of Architectural CAD Drafting Services

Architectural CAD drafting services encompass a wide range of tasks, including:

  1. Design Development:
    • Creating initial design concepts and refining them based on client feedback.
    • Developing detailed plans, sections, and elevations to provide a comprehensive view of the project.
  2. Construction Documentation:
    • Producing precise construction drawings that guide builders during the construction phase.
    • Ensuring all necessary details, such as dimensions, materials, and construction techniques, are accurately represented.
  3. 3D Modelling and Visualisation:
    • Creating 3D models to help clients and stakeholders visualise the final product.
    • Utilising advanced rendering techniques to produce photorealistic images and animations.
  4. Collaboration and Coordination:
    • Facilitating communication between architects, engineers, contractors, and clients.
    • Ensuring all project stakeholders have access to the most up-to-date drawings and models.

Benefits of Using Professional Architectural CAD Drafting Services

  1. Accuracy and Precision:
    • CAD software allows for highly detailed and accurate drawings, reducing the likelihood of errors during construction.
    • The ability to easily modify and update designs ensures that any changes can be quickly implemented.
  2. Efficiency and Speed:
    • CAD drafting significantly speeds up the design process compared to traditional methods.
    • Advanced tools and features enable drafters to complete complex tasks more efficiently.
  3. Cost-Effectiveness:
    • By identifying and resolving potential issues during the design phase, CAD drafting can help prevent costly mistakes during construction.
    • Improved accuracy and efficiency also contribute to overall cost savings.
  4. Enhanced Visualisation:
    • 3D modelling and visualisation provide a realistic view of the project, helping clients make informed decisions.
    • Virtual walkthroughs and renderings can showcase the design in a way that 2D drawings cannot.
  5. Improved Collaboration:
    • Digital drawings can be easily shared and accessed by all project stakeholders.
    • Cloud-based platforms enable real-time collaboration, ensuring everyone is on the same page.

Choosing the Right Architectural CAD Drafting Service

When selecting a provider for architectural CAD drafting services, consider the following factors:

  1. Experience and Expertise:
    • Look for a firm with a proven track record and extensive experience in architectural drafting.
    • Check for qualifications, certifications, and testimonials from previous clients.
  2. Technology and Tools:
    • Ensure the service provider uses the latest CAD software and tools.
    • Advanced technology can enhance the quality and efficiency of the drafting process.
  3. Portfolio and Samples:
    • Review the provider’s portfolio to assess the quality and style of their work.
    • Request samples of previous projects to gauge their capabilities.
  4. Communication and Support:
    • Effective communication is crucial for successful collaboration.
    • Choose a provider that offers excellent customer support and is responsive to your needs.
  5. Cost and Value:
    • Compare pricing structures and ensure you understand what is included in the service.
    • Consider the overall value and return on investment, rather than just the initial cost.

Conclusion

Architectural CAD drafting services play a vital role in modern architectural design and construction. By leveraging the power of CAD technology, professionals can create precise, efficient, and visually stunning designs that meet the demands of today’s construction industry. Whether you’re an architect, engineer, or builder, partnering with a reliable CAD drafting service can help you bring your vision to life with accuracy and efficiency.

For those seeking top-notch architectural drafting services, look no further than astcad. With a commitment to excellence and a passion for innovation, we are here to support your projects every step of the way. Contact us today to learn more about how our CAD drafting services can benefit your next project.


CS

Claire Sutton

Architectural CAD Specialist & Technical Writer · BArch (Hons), QUT · ASTCAD, Brisbane

Claire has 10 years of experience in Revit BIM modelling, architectural documentation, and CAD conversion projects across Southeast Queensland and NSW. She has delivered NCC-compliant documentation for residential, commercial, and industrial facilities.

More articles by Claire Sutton →
Piping Design

In the intricate world of engineering, precision and innovation are paramount — nowhere more than in piping design drafting services. Astcad stands at the forefront, offering top-tier Piping Design and Drafting Services to propel your projects to new heights of success. With a blend of expertise, cutting-edge technology, and a commitment to excellence, Astcad delivers solutions tailored to your unique needs.

Piping Design and Drafting Services

Understanding Piping Design Services: Piping design is the lifeline of various industries, ensuring the seamless flow of fluids and gases within intricate systems. Astcad’s Piping Design Services encompass the entire lifecycle of a project, from conceptualization to execution. Our team of experienced engineers meticulously plans and designs piping systems that adhere to industry standards and regulations while optimising efficiency and cost-effectiveness.

Key Components of Astcad Piping Design Services:

  1. Comprehensive Analysis: Before diving into the design phase, we conduct a thorough analysis of your project requirements, considering factors such as fluid dynamics, pressure, temperature, and environmental conditions. This meticulous approach ensures that our designs are not only functional but also robust and reliable.
  2. Innovative Design Solutions: Leveraging the latest software tools and technologies, our skilled designers craft innovative piping solutions that meet the most complex challenges. Whether it’s designing intricate networks for industrial plants or routing piping systems in commercial buildings, Astcad delivers designs that exceed expectations.
  3. Optimisation and Efficiency: Efficiency is the cornerstone of our design philosophy. Through careful optimisation and simulation, we strive to minimise material usage, reduce energy consumption, and enhance overall system performance. This not only translates to cost savings for our clients but also contributes to a more sustainable future.

Piping Drafting Services: Drafting is the blueprint of every successful project, providing a visual roadmap for implementation. Astcad’s Piping Drafting Services transform conceptual designs into detailed technical drawings that serve as the foundation for construction and fabrication.

  1. Precision Drafting: Our draftsmen are experts in their craft, proficient in industry-standard drafting software and techniques. From isometric drawings to piping plans and elevations, we ensure that every detail is accurately represented, facilitating smooth project execution.
  2. Collaborative Approach: We believe in close collaboration with our clients throughout the drafting process. Your feedback and insights are invaluable to us, allowing us to tailor our drafts to your specific requirements and preferences.
  3. Quality Assurance: Quality is non-negotiable at Astcad. Before finalising any drawing, our team conducts rigorous quality checks to ensure compliance with relevant codes, standards, and specifications. This meticulous attention to detail minimises errors and ensures the highest level of accuracy.

What is the difference between a piping engineer and a piping designer?

A piping engineer and a piping designer play distinct yet complementary roles in the field of piping design and engineering. Here’s a breakdown of the key differences between the two:

Responsibilities:
Piping Engineer: A piping engineer is primarily responsible for the overall design, analysis, and engineering of piping systems. This includes determining system requirements, selecting appropriate materials, sizing pipes, calculating pressure drops, and ensuring compliance with relevant codes and standards. Piping engineers focus on the technical aspects of piping system design and often work on conceptualizing and planning the layout of piping networks.
Piping Designer: On the other hand, a piping designer focuses on translating the engineering specifications provided by the piping engineer into detailed technical drawings or blueprints. Piping designers create isometric drawings, piping plans, and other visual representations that serve as the basis for construction and fabrication. They work closely with engineers to ensure that the design meets all requirements and specifications.

Skill Set:
Piping Engineer: Piping engineers typically possess a strong background in mechanical engineering or a related field. They have in-depth knowledge of fluid dynamics, thermodynamics, structural analysis, and piping design principles. They also need proficiency in engineering software tools for analysis and simulation.
Piping Designer: Piping designers are skilled in drafting and CAD (Computer-Aided Design) software. They have a keen eye for detail and a solid understanding of engineering drawings and symbols. While they may not require the same level of technical expertise as piping engineers, they must have a thorough understanding of piping design principles and industry standards.

Decision-Making Authority:
Piping Engineer: Piping engineers are responsible for making critical design decisions based on engineering principles, project requirements, and regulatory guidelines. They have the authority to approve design changes, specify materials, and ensure the overall integrity and functionality of the piping system.
Piping Designer: Piping designers work under the guidance of piping engineers and typically do not have the same level of decision-making authority. Their role is to execute the design vision established by the engineering team and to produce accurate drawings that reflect the engineering specifications.

What is piping design?

Piping design is a crucial aspect of engineering that involves the planning, layout, and detailed specification of piping systems used to convey fluids (liquids and gases) from one location to another within industrial plants, commercial buildings, and other facilities. These systems can range from simple plumbing in a residential building to complex networks in industrial plants such as refineries, chemical plants, power plants, and offshore oil rigs.

Piping design encompasses several key elements:
System Layout: Determining the optimal routing of pipes to connect various components such as tanks, vessels, pumps, valves, heat exchangers, and other equipment while considering factors like space constraints, safety, accessibility, and operational efficiency.
Pipe Sizing: Calculating the appropriate diameter and wall thickness of pipes based on the flow rate, pressure, temperature, fluid properties, and other design criteria to ensure adequate performance and structural integrity.
Material Selection: Choosing suitable materials for pipes and fittings based on factors like the type of fluid being transported, operating conditions (temperature, pressure, corrosion, etc.), cost, and compatibility with other system components.
Stress Analysis: Assessing the mechanical stresses and loads on the piping system under various operating conditions to ensure that it can withstand thermal expansion, pressure fluctuations, vibrations, and other forces without failure.
Support and Restraint Design: Designing supports, hangers, and restraints to securely anchor and support the piping system, preventing excessive movement, sagging, or buckling while allowing for thermal expansion and contraction.
Safety and Regulatory Compliance: Ensuring that the piping design meets relevant industry codes, standards, and regulations governing aspects such as pressure containment, materials, welding procedures, inspection, and testing to ensure safety, reliability, and compliance with legal requirements.


JH

James Hartley

Senior Mechanical Engineer · BEng (Mechanical), UQ · Member, Engineers Australia · ASTCAD, Brisbane

James has 14 years of hands-on experience delivering CAD design, structural drafting, and engineering documentation across Australia’s mining, oil & gas, and manufacturing sectors. He specialises in SolidWorks, Autodesk Inventor, and AutoCAD for complex multi-discipline projects.

More articles by James Hartley →
Product Design and Development

Product Design and Development

In the ever-evolving landscape of product design and development, the role of engineering CAD drafting is indispensable. It’s the foundation upon which innovative ideas are transformed into tangible, marketable products. ASTCAD emerges as a beacon in this domain, offering cutting-edge solutions that redefine the way products are conceptualized, designed, and brought to fruition.

Introduction to ASTCAD:

ASTCAD, short for Advanced CAD Technologies, is a pioneering company at the forefront of engineering CAD drafting services. With a team of skilled professionals and state-of-the-art technology, ASTCAD is committed to providing comprehensive product design and development solutions across various industries.

The Importance of Product Design and Development:

In today’s competitive market, product design and development play a crucial role in determining the success of a business. It’s not merely about creating aesthetically pleasing products but also about addressing functional requirements, ergonomic considerations, manufacturability, and market demands. Effective product design and development can significantly impact a company’s bottom line, driving innovation, enhancing user experience, and gaining a competitive edge.

Engineering Design in the Current Context:

As technology advances and consumer preferences evolve, the landscape of engineering design is constantly shifting. From the integration of AI and machine learning algorithms to the growing emphasis on sustainability and environmental consciousness, engineers are facing new challenges and opportunities in product development. ASTCAD recognises these trends and tailors its services to address the dynamic needs of the industry.

Key Features of ASTCAD’s Services:

  1. Advanced CAD Software: ASTCAD utilises the latest CAD software tools, enabling precise modelling, simulation, and analysis of product designs. From 2D sketches to complex 3D models, ASTCAD’s expertise ensures accuracy and efficiency throughout the design process.
  2. Collaborative Approach: ASTCAD believes in fostering collaboration between designers, engineers, and clients. Through effective communication and feedback loops, ASTCAD ensures that the final product aligns with the client’s vision while meeting technical requirements and industry standards.
  3. Iterative Design Process: ASTCAD follows an iterative design process, allowing for rapid prototyping and refinement. This approach enables clients to visualise and test various design iterations, accelerating the development cycle and minimising time to market.
  4. Comprehensive Support: Beyond CAD drafting, ASTCAD offers a range of supplementary services, including feasibility studies, design optimisation, and prototyping assistance. Whether it’s a small-scale project or a large-scale production run, ASTCAD provides end-to-end support to meet client needs.

Case Studies:

  1. Automotive Industry: ASTCAD collaborated with a leading automotive manufacturer to design a lightweight yet durable chassis for electric vehicles. Through simulation and optimisation techniques, ASTCAD developed a robust design that met safety standards while maximising energy efficiency.
  2. Consumer Electronics: A startup specialising in wearable technology partnered with ASTCAD to develop a sleek and ergonomic smartwatch. By leveraging CAD modelling and rapid prototyping, ASTCAD helped refine the design to enhance user comfort and aesthetics, leading to positive feedback from early adopters.

Conclusion:

In an era defined by rapid technological advancements and changing consumer preferences, ASTCAD stands as a beacon of innovation in product design and development. By leveraging advanced CAD drafting techniques, collaborative methodologies, and a customer-centric approach, ASTCAD empowers businesses to bring their ideas to life seamlessly. Whether it’s designing the next groundbreaking gadget or optimising manufacturing processes, ASTCAD remains committed to driving excellence and pushing the boundaries of possibility in engineering design.

What is product design and services?

Product design and services encompass the creation, development, and refinement of tangible products as well as intangible services to meet the needs and desires of customers. Here’s a breakdown:

Product Design: This involves the process of creating a new product or improving an existing one. It typically includes conceptualizing ideas, designing the product’s appearance and functionality, engineering its components, testing prototypes, and finalizing production specifications. Product designers consider aspects such as user experience, ergonomics, aesthetics, materials, manufacturing processes, and cost-effectiveness.

Service Design: Unlike physical products, services are intangible offerings that provide value to customers. Service design focuses on optimizing the customer experience throughout the service delivery process. This includes understanding customer needs and behaviors, designing service processes and interactions, creating service blueprints, and implementing systems to ensure consistent quality and efficiency. Service designers often use techniques such as journey mapping, customer research, and prototyping to develop and improve services.

What is the role of product design and development?

The role of product design and development is multifaceted and critical to the success of a business. Here are some key aspects of their roles:

Identifying Needs and Opportunities: Product design and development teams research market trends, customer needs, and emerging technologies to identify opportunities for new products or improvements to existing ones. They gather insights through market analysis, customer feedback, and competitive research to inform their design decisions.

Conceptualization and Ideation: These teams are responsible for generating creative ideas and concepts for new products or services. They brainstorm, sketch, and prototype different concepts, exploring various possibilities before narrowing down to the most promising ideas.
Designing Solutions: Product designers translate conceptual ideas into tangible designs, considering factors such as user experience, aesthetics, functionality, and manufacturability. They create detailed design specifications and collaborate with engineers and other stakeholders to ensure feasibility and alignment with project goals.

Prototyping and Testing: Prototyping is a crucial step in the product development process, allowing teams to validate design concepts and identify potential issues early on. Product designers create prototypes—ranging from simple sketches to functional models—and conduct usability testing to gather feedback from users and iterate on the design.

Iterative Development: Product design and development is an iterative process, with multiple rounds of refinement based on feedback and testing results. Designers continuously refine and improve the product design, addressing any issues or limitations that arise during development.


JH

James Hartley

Senior Mechanical Engineer · BEng (Mechanical), UQ · Member, Engineers Australia · ASTCAD, Brisbane

James has 14 years of hands-on experience delivering CAD design, structural drafting, and engineering documentation across Australia’s mining, oil & gas, and manufacturing sectors. He specialises in SolidWorks, Autodesk Inventor, and AutoCAD for complex multi-discipline projects.

More articles by James Hartley →
Shop Drawings

In the fast-paced world of engineering and design, the need for efficient and precise drafting services is more crucial than ever. ASTCAD, a cutting-edge Engineering CAD Drafting company, stands at the forefront of innovation, providing unparalleled solutions to meet the demands of modern engineering design. Specialising in Rapid Prototyping Drafting Services, ASTCAD is revolutionizing the industry with its commitment to accuracy, speed, and quality.

Rapid Prototyping Drafting Services

ASTCAD: The Pioneer in Rapid Prototyping Drafting Services: ASTCAD has earned a reputation as a leader in the engineering design domain, with a primary focus on Rapid Prototyping Drafting Services. Leveraging advanced technologies and a team of skilled professionals, ASTCAD ensures that clients receive top-notch drafting services that align with the current trends and demands of the industry.

  1. Cutting-Edge Technology: At the heart of ASTCAD’s success is its dedication to staying ahead of technological advancements. The company employs state-of-the-art CAD software and hardware to facilitate the rapid prototyping process. This not only enhances precision but also accelerates the overall design cycle, allowing clients to bring their concepts to fruition in record time.
  2. Seamless Integration of 3D Printing: In response to the growing demand for rapid prototyping, ASTCAD seamlessly integrates 3D printing technologies into its drafting services. This allows clients to visualise and test their designs in a tangible and realistic manner before moving forward with full-scale production. ASTCAD’s expertise in 3D printing ensures that prototypes are not only accurate but also functional, providing invaluable insights during the design validation phase.
  3. Collaborative Approach to Engineering Design: ASTCAD understands the importance of collaboration in the engineering design process. Through its user-friendly online platform, clients can actively participate in the drafting process, providing feedback and making real-time adjustments. This collaborative approach ensures that the final product meets and exceeds the client’s expectations.
  4. Efficiency and Cost-Effectiveness: Rapid prototyping is not only about speed but also about cost-effectiveness. ASTCAD’s streamlined processes and efficient workflows result in significant cost savings for clients. By minimising errors and reducing the time required for revisions, ASTCAD ensures that projects are completed within budget constraints, making it an ideal partner for businesses of all sizes.
  5. Adapting to Industry Trends: ASTCAD recognises the ever-evolving nature of the engineering design industry. The company stays abreast of current trends, incorporating the latest advancements into its services. From generative design algorithms to augmented reality (AR) integration, ASTCAD ensures that its clients benefit from the most innovative solutions available.

Engineering Design

Conclusion: In the dynamic landscape of engineering design, ASTCAD stands as a beacon of innovation and reliability. Through its Rapid Prototyping Drafting Services, ASTCAD empowers clients to transform ideas into reality with unprecedented speed and precision. By embracing cutting-edge technologies, fostering collaboration, and adapting to industry trends, ASTCAD continues to shape the future of engineering design. For businesses seeking a partner that combines expertise with forward-thinking solutions, ASTCAD is the name to trust.

What is rapid prototyping in CAD?

Rapid prototyping in Computer-Aided Design (CAD) refers to the process of quickly creating physical prototypes of a product design directly from a 3D CAD model. It involves using various technologies like 3D printing, CNC machining, or laser cutting to fabricate a physical representation of the digital design.
The main purpose of rapid prototyping is to accelerate the product development cycle by allowing designers and engineers to iterate on designs rapidly and cost-effectively. Instead of waiting weeks or months for traditional prototyping methods, such as machining or molding, rapid prototyping enables the creation of prototypes in a matter of hours or days.
This iterative process helps in identifying design flaws, testing functionality, and gathering feedback early in the development stage, ultimately leading to better final products. Rapid prototyping is widely used in industries like automotive, aerospace, consumer electronics, and healthcare for design validation, concept modeling, and functional testing.

What are different types of rapid prototyping?

There are several different types of rapid prototyping techniques, each with its own strengths and applications. Here are some of the most common ones:
3D Printing/Additive Manufacturing: This is perhaps the most popular rapid prototyping technique. It builds up objects layer by layer from digital designs. There are various methods within 3D printing, including Fused Deposition Modeling (FDM), Stereolithography (SLA), Selective Laser Sintering (SLS), and others.
CNC Machining: Computer Numerical Control (CNC) machining involves cutting away material from a solid block to create the desired shape. It’s suitable for producing prototypes from a wide range of materials, including plastics, metals, and composites.
Injection Molding: While traditionally not considered rapid prototyping due to longer lead times and higher costs, rapid tooling and soft tooling techniques in injection molding have made it more viable for prototyping. It’s useful when prototyping parts that will eventually be mass-produced through injection molding.
Laser Cutting and Engraving: This technique involves using a high-powered laser to cut or engrave materials like acrylic, wood, and metal sheets. It’s commonly used for creating 2D prototypes, such as flat parts and assemblies.


JH

James Hartley

Senior Mechanical Engineer · BEng (Mechanical), UQ · Member, Engineers Australia · ASTCAD, Brisbane

James has 14 years of hands-on experience delivering CAD design, structural drafting, and engineering documentation across Australia’s mining, oil & gas, and manufacturing sectors. He specialises in SolidWorks, Autodesk Inventor, and AutoCAD for complex multi-discipline projects.

More articles by James Hartley →
3D Product Animation

Professional 3D animation services are one of the clearest ways to communicate a design. In the dynamic landscape of engineering and design, staying ahead requires not only technical prowess but also innovative solutions that can bring ideas to life. ASTCAD, a prominent player in the field of Computer-Aided Design (CAD) drafting, has emerged as a key player offering cutting-edge 3D product animation, rendering, and design services in Australia. In this article, we will delve into the world of ASTCAD, exploring how the company is revolutionizing engineering design and meeting the demands of the contemporary market.

ASTCAD: A Pioneer in 3D Product Animation Services

As industries evolve, the demand for realistic and visually appealing representations of products has increased exponentially. ASTCAD has positioned itself as a pioneer in 3D product animation, harnessing the power of advanced CAD technologies to create immersive and dynamic visualisations. Whether it’s showcasing a new product concept, explaining complex engineering processes, or creating marketing materials, ASTCAD’s 3D product animation services have become indispensable for businesses looking to make a lasting impression.

The Role of 3D Product Rendering in Engineering Design:

In the realm of engineering, accurate and detailed renderings are crucial for effective communication and decision-making. ASTCAD recognises this need and excels in providing high-quality 3D product rendering services. Through a meticulous process that involves capturing every nuance of the product, ASTCAD ensures that clients receive renderings that are not only visually stunning but also functionally accurate. This attention to detail is particularly valuable in industries such as manufacturing, architecture, and product development, where precision is paramount.

3D Product Design Service Tailored for the Australian Market:

ASTCAD understands that each market has its unique challenges and requirements. In catering to the Australian market, the company has developed specialised 3D product design services that align with the needs of local businesses. From conceptualization to prototyping, ASTCAD’s team of experienced engineers and designers collaborate closely with clients to bring their ideas to fruition. The company’s commitment to delivering customised solutions sets it apart, ensuring that every project is tailored to meet the specific demands of the Australian engineering landscape.

The Advantages of ASTCAD’s Engineering Design Approach:

  1. Enhanced Collaboration: ASTCAD facilitates seamless collaboration between design teams, engineers, and clients through its cloud-based CAD drafting platform. This ensures real-time communication, reducing project timelines and enhancing overall efficiency.
  2. Cost-Efficiency: By leveraging state-of-the-art technologies, ASTCAD optimises the engineering design process, leading to cost savings for clients. The company’s commitment to delivering value is reflected in its competitive pricing structure.
  3. Sustainability Focus: In line with the global shift towards sustainable practices, ASTCAD integrates eco-friendly design principles into its engineering solutions. This approach not only aligns with the current industry trends but also positions clients for long-term success in a changing market.

Conclusion:

ASTCAD stands at the forefront of engineering design services, offering a comprehensive suite of solutions that cater to the evolving needs of the Australian market. Through its expertise in 3D product animation, rendering, and design, the company empowers businesses to visualise, innovate, and succeed in a competitive landscape. As technology continues to advance, ASTCAD remains dedicated to pushing the boundaries of what is possible in engineering design, making it a trusted partner for those seeking excellence in CAD drafting services.

What is 3D products animation?

3D product animation involves creating dynamic, lifelike representations of products using computer-generated imagery (CGI). This technique allows designers to showcase products from various angles, demonstrate functionality, and highlight features in a visually engaging way.
Here’s how it typically works:
Modeling: Artists create a digital 3D model of the product using specialized software. This involves accurately capturing its shape, texture, and details.
Texturing: Textures are applied to the 3D model to make it look realistic. This includes adding colors, surface details, and materials like metal, plastic, or glass.
Animation: Animators bring the 3D model to life by defining its movements and interactions. This can involve simple rotations or complex sequences to showcase different aspects of the product.
Lighting and Rendering: Lighting is carefully set up to illuminate the product realistically, and then the scene is rendered to create the final images or video.
Post-Processing: After rendering, additional effects and enhancements may be applied to the animation to further improve its visual appeal.

Why 3D product animation?

There are several reasons why businesses choose to utilize 3D product animation:
Visual Appeal: 3D animations are visually captivating and can showcase products in ways that traditional photography or video cannot. They allow for dynamic camera angles, detailed close-ups, and creative visual effects that grab the viewer’s attention.
Flexibility: With 3D animation, products can be showcased in any environment, under any lighting conditions, and from any angle. This flexibility allows for greater creativity and customization in presenting the product.
Cost-Effectiveness: While the initial investment in creating 3D models and animations may be higher than traditional photography or video production, in the long run, it can be more cost-effective. Once a 3D model is created, it can be reused and repurposed for various marketing materials without the need for expensive reshoots.
Product Customization: 3D animation allows for easy customization of products. Different variations, colors, and configurations can be showcased without the need to physically produce each version.
Demonstration of Functionality: Complex products or features can be demonstrated more effectively through animation. Animations can show how a product works, its features, and benefits in a clear and understandable way.


JH

James Hartley

Senior Mechanical Engineer · BEng (Mechanical), UQ · Member, Engineers Australia · ASTCAD, Brisbane

James has 14 years of hands-on experience delivering CAD design, structural drafting, and engineering documentation across Australia’s mining, oil & gas, and manufacturing sectors. He specialises in SolidWorks, Autodesk Inventor, and AutoCAD for complex multi-discipline projects.

More articles by James Hartley →
Get a free quote — 1800 287 223