Learning how to create your first 2D Mechanical Drawing in AutoCAD can feel challenging at first, but once you understand the basic tools and workflow, the entire drafting process becomes smooth and enjoyable. AutoCAD is one of the most widely used CAD software in the mechanical engineering industry because of its precision, flexibility, and powerful drafting capabilities. Whether you are a student, beginner, or aspiring mechanical drafter, this step-by-step guide will help you confidently create accurate and professional 2D drawings.
2D Mechanical Drawing in AutoCAD
In this tutorial, we’ll walk through the essential stages of setting up your workspace, creating geometry, adding dimensions, and preparing your final drawing for printing or sharing. By the end, you’ll have a clear understanding of how to draft your first 2D Mechanical Drawing in AutoCAD from scratch.
1. Start by Setting Up Your AutoCAD Workspace
Before creating any drawing, it’s essential to set up your workspace for mechanical drafting. This includes choosing measurement units, limits, layers, and important drafting settings.
Steps:
- Open AutoCAD and start a new drawing.
- Type UNITS → set to Millimeters (or Inches) depending on the project.
- Set the precision to a suitable value (typically 0.00 for mechanical drawings).
- Use the LIMITS command to define your working area.
- Type Z → A to zoom all.
A well-configured workspace ensures consistency and accuracy throughout your 2D Mechanical Drawing in AutoCAD.
2. Create Layers for Better Organization
Layers help you organize your drawing by separating objects like outlines, hidden lines, centerlines, hatching, and dimensions.
Suggested Layers:
- Object (Continuous Line, 0.50 mm)
- Centerline (Center Linetype)
- Hidden (Hidden Linetype)
- Dimension (Continuous, lighter color)
- Hatch (Solid or pattern)
Use LAYER command → create these layers → assign colors and linetypes.
Always draw mechanical components on the correct layer for a neat and professional finish.
3. Start Creating Basic Shapes Using Drawing Tools
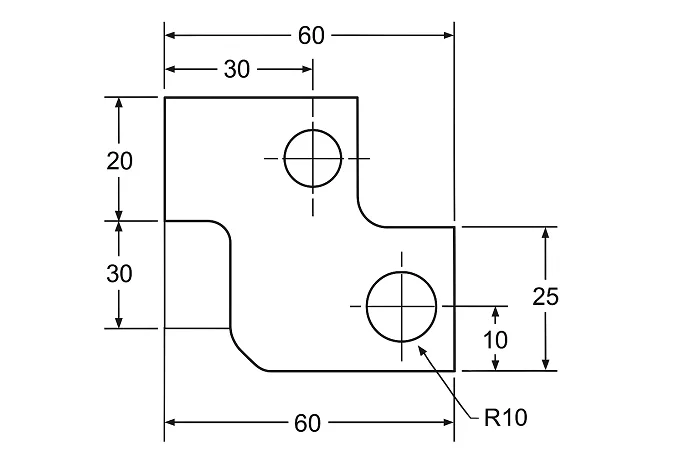
Mechanical drawings often begin with simple shapes—circles, lines, arcs, and rectangles—that later combine into complete machine components.
Important Tools to Use:
- LINE
- CIRCLE
- ARC
- RECTANGLE
- POLYLINE
Example Steps:
- Draw the main body using the LINE or POLYLINE tool.
- Add circular holes using CIRCLE.
- Create fillets using the FILLET command.
- Use OFFSET to create parallel edges or features.
- Use TRIM and EXTEND to refine geometry.
Break the part down into simple features and draft them step-by-step. This method helps beginners build the entire 2D Mechanical Drawing in AutoCAD easily.
4. Add Centerlines and Hidden Lines
Mechanical drawings require proper representation of hidden edges and center points.
Add Centerlines:
- Draw lines along the symmetry or center axis.
- Use Center linetype for correct representation.
Add Hidden Lines:
- Use dashed/hidden linetype to indicate features not visible from the viewing direction.
- Ensure hidden lines do not overpower object lines.
These elements make your 2D Mechanical Drawing in AutoCAD follow industry drafting standards.
5. Use AutoCAD Modify Tools for Precision
Modify tools help refine your sketch to match exact mechanical dimensions.
Common Tools:
- TRIM
- EXTEND
- FILLET
- MIRROR
- MOVE
- COPY
- OFFSET
For symmetrical parts, the MIRROR tool saves time and ensures perfect alignment.
For repeated features, use ARRAY command to create patterns like holes or slots.
6. Add Accurate Dimensions to Your Mechanical Drawing
Dimensioning is one of the most important parts of mechanical drafting. AutoCAD provides multiple dimensioning tools to capture sizes, distances, and angles.
Add Dimensions Using:
- DIMLINEAR for straight edges
- DIMDIAMETER for hole diameters
- DIMRADIUS for arcs
- DIMALIGNED for slanted edges
- DIMCENTER for center marks
- DIMANGULAR for angles
Make sure to:
- Use consistent dimension text height (2.5 mm or as per standard).
- Avoid overlapping or cluttered dimensions.
- Follow standard dimensioning rules (ISO/ANSI).
Good dimensioning ensures the manufacturer can understand your 2D Mechanical Drawing in AutoCAD without confusion.
7. Apply Hatching for Section Views (Optional)
If your drawing includes a section view, add hatching to show material cut areas.
Steps:
- Use HATCH command.
- Choose appropriate pattern (ANSI31 is common for mechanical parts).
- Select the area to apply hatch.
- Adjust scale to match drawing size.
Hatching helps make your drawing more readable and professional.
8. Add Title Block and Border
A complete mechanical drawing includes a title block with essential information.
Include:
- Part Name
- Drawing Number
- Material
- Scale
- Date
- Drafter Name
- Revision Table
Insert a pre-made title block or draw your own and place it in Layout Tab (Paper Space).
9. Prepare the Drawing for Printing (Plotting)
To finalize your 2D Mechanical Drawing in AutoCAD, set up plotting settings.
Steps:
- Switch to Layout View.
- Choose paper size (A4/A3/A2).
- Insert viewport and adjust scale (1:1, 1:2, 2:1 or as needed).
- Use PLOT command.
- Choose plot style monochrome.ctb for clean black & white output.
Your drawing is now ready for professional use.
Is AutoCAD good for beginners learning mechanical drafting?
Yes, AutoCAD is one of the best tools for beginners. Its commands are easy to learn, and it provides industry-standard tools for mechanical drafting.
How long does it take to learn 2D Mechanical Drawing in AutoCAD?
Most beginners can start creating simple drawings within 1–2 weeks of practice.
Do I need engineering knowledge to make mechanical drawings?
Basic understanding helps, but many beginners start with tutorials and gradually learn engineering concepts.
What is the most important part of a 2D mechanical drawing?
Accuracy. Precise geometry, dimensions, and clear annotations are essential for manufacturing.
Can I convert my 2D drawing into 3D later?
Yes. AutoCAD and many other CAD tools allow converting 2D sketches into 3D models.