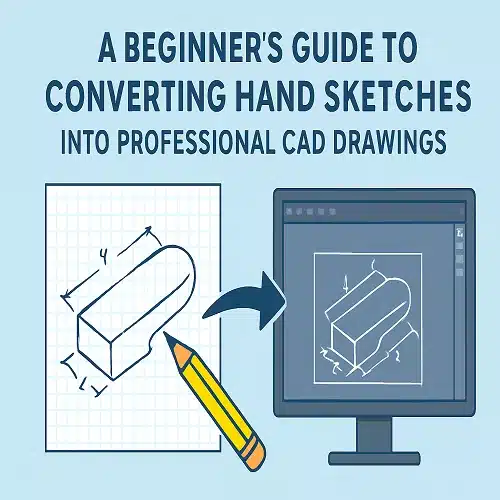
Turning hand-drawn sketches into detailed, accurate CAD drawings is one of the most important steps in today’s design, engineering, and construction workflows. Whether you’re an architect sketching a concept on paper, a product designer drawing your first prototype idea, or a homeowner planning renovations, converting a simple sketch into a computer-generated drawing unlocks clarity, precision, and professional quality.
This beginner-friendly guide walks you through the entire process step by step. By the end, you’ll understand exactly how to transform rough sketches into polished CAD drawings ready for manufacturing, construction, or presentation.
Why Convert Hand Sketches Into CAD Drawings?
Hand sketches are perfect for capturing ideas quickly. But for technical execution, you need accuracy. This is where CAD (Computer-Aided Design) comes in.
Here’s why converting your sketches into CAD drawings matters:
- Precision: CAD software ensures correct dimensions, scale, and alignment.
- Easy Editing: You can modify, update, or redesign quickly.
- Professional Presentation: CAD drawings look clean and industry-standard.
- Compatibility: CAD files can be shared with engineers, manufacturers, or drafting services.
- 3D Capability: Sketches can evolve into 3D models for visualization.
- Digital Archive: No risk of losing or damaging paper sketches.
For beginners, the conversion process may seem complex, but with the right steps, it becomes straightforward.
Step-by-Step Guide: How to Convert Hand Sketches Into Professional CAD Drawings
Step 1: Start With a Clear Hand Sketch
Your final CAD drawing is only as good as your initial sketch.
Tips for creating a clear sketch:
- Use a pencil or black ink for visible lines.
- Include basic dimensions (length, width, height).
- Add notes or labels for specific features.
- Keep the sketch clean—avoid smudges.
- Use graph paper for better alignment (optional).
Remember, it doesn’t need to be perfect—just understandable.
Step 2: Scan or Photograph Your Sketch
The next step is to digitize your sketch.
Two simple methods:
1. Scan the Sketch
- Use any flatbed scanner.
- Save the file as PNG, JPG, or PDF.
Pros: High clarity and ideal for CAD tracing.
2. Photograph the Sketch
- Use a smartphone camera.
- Capture the sketch in good lighting.
- Hold the camera parallel to avoid distortion.
Tip: Ensure edges are visible and lines are sharp.
Step 3: Import the Image Into Your CAD Software
Most CAD tools allow you to import a raster image (your sketch) and use it as a background layer.
Popular CAD software options:
- AutoCAD
- SolidWorks
- Fusion 360
- SketchUp
- Revit (for architectural drafting)
- LibreCAD (free)
Once imported, scale the image roughly to size. You’ll refine the scale later using dimensions.
Step 4: Trace the Geometry
Now the real drafting begins.
Use CAD tools like:
- Line
- Polyline
- Arc
- Circle
- Spline
- Trim
- Offset
Follow the sketch lines and trace over them cleanly. This step transitions your rough drawing into professional CAD geometry.
Step 5: Add Dimensions and Annotations
CAD drawings must be dimensionally correct.
Add:
- Linear dimensions
- Angular dimensions
- Radiuses and diameters
- Notes and labels
- Title block (if needed)
Make sure every important measurement is accurate. This step ensures your drawing can be used for fabrication or construction.
Step 6: Refine the Drawing
Check for:
- Overlapping lines
- Gaps
- Incorrect snapping points
- Layer organization
- Line weights
- Symbols and standard conventions
Good practice:
- Use separate layers for walls, text, dimensions, and centerlines.
- Apply standard drafting norms (ISO, ANSI, ASME depending on industry).
Step 7: Export the Final CAD Drawing
Once complete, export your drawing into the required formats.
Common file types include:
- DWG (AutoCAD standard)
- DXF (universally compatible)
- PDF (for sharing or printing)
- STL / STEP / IGES (if 3D modeling is used)
Your hand sketch is now officially a professional CAD drawing ready for real-world use.
Professional Option: Use CAD Conversion Services
If you’re new to CAD or short on time, hiring a CAD conversion service is a smart choice. Drafting professionals can turn your sketch into:
- Architectural plans
- Mechanical engineering drawings
- Product design files
- 2D and 3D models
- Construction-ready blueprints
This ensures accuracy, compliance with standards, and fast turnaround.
Tips for Beginners
- Start with simple shapes and structures.
- Learn basic CAD shortcuts—they save hours.
- Keep your layers organized from the beginning.
- Watch beginner tutorials on your preferred CAD software.
- Don’t stress over perfection—CAD allows unlimited refinement.
Conclusion
Converting hand sketches into professional CAD drawings bridges the gap between ideas and execution. Whether you’re designing a home, engineering a product, or sketching a creative concept, CAD gives you the precision and professionalism needed for real-world application.
With the steps in this beginner-friendly guide and the right tools (or professional drafting support), anyone can transform a simple sketch into a polished technical drawing.
Can I convert any type of sketch into CAD drawings?
Yes. Whether architectural layouts, mechanical parts, product concepts, or diagrams—almost any sketch can be converted into CAD drawings.
Do I need expensive software to create CAD drawings?
Not necessarily. There are many free or low-cost CAD tools like LibreCAD, FreeCAD, and Fusion 360 (free for personal use).
How accurate does my hand sketch need to be?
Your sketch doesn’t need to be perfect. As long as the idea and key dimensions are clear, it can be converted into a precise CAD drawing.
What file formats do drafting professionals usually provide?
The most common are DWG, DXF, PDF, and 3D formats like STEP or STL depending on the project type.
Can CAD drawings be turned into 3D models?
Absolutely. Once your sketch is drafted in 2D CAD, it can be extruded or modeled into 3D using software like SolidWorks, Revit, or Fusion 360.
