Learning how to create your first CAD Drawing can feel overwhelming at first, but once you understand the process, it becomes an exciting and rewarding skill. Whether you’re an aspiring engineer, architect, designer, or student, mastering computer-aided design (CAD) gives you the ability to bring ideas to life with precision and creativity.
In this beginner-friendly tutorial, we’ll guide you step-by-step through the process of creating your first CAD Drawing, from setting up your software to finalizing your design for presentation or printing.
What is a CAD Drawing?
A CAD Drawing is a digital representation of an object, building, or mechanical part created using Computer-Aided Design (CAD) software. Unlike hand drafting, CAD drawings are accurate, easy to modify, and can be stored or shared digitally.
They’re widely used in industries such as:
- Architecture: for floor plans and structural layouts
- Mechanical Engineering: for parts, assemblies, and tools
- Electrical Design: for wiring diagrams and circuit layouts
- Civil Engineering: for roads, bridges, and land development plans
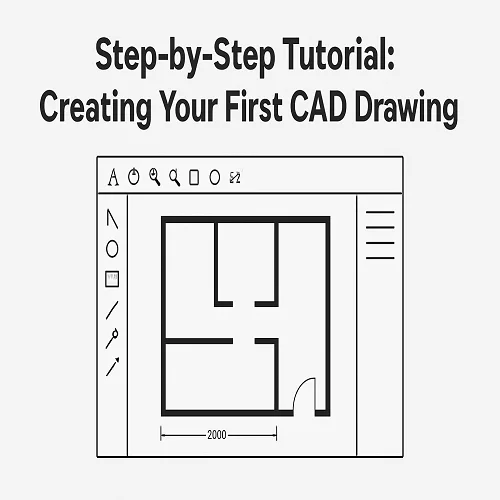
Step-by-Step Tutorial: How to Create Your First CAD Drawing
Step 1: Choose the Right CAD Software
The first step in your CAD journey is choosing a suitable program. Popular CAD software options include:
- AutoCAD – great for 2D and 3D drafting
- SolidWorks – ideal for mechanical part design
- Fusion 360 – user-friendly for beginners and hobbyists
- DraftSight or FreeCAD – perfect for those starting out on a budget
For beginners, AutoCAD or Fusion 360 are often the best starting points due to their tutorials and large online communities.
Step 2: Set Up Your Drawing Environment
Once you open your CAD software, set up your workspace.
- Define units: Decide whether you’ll use millimeters, centimeters, or inches depending on your project.
- Set limits: This defines the drawing area or boundary of your design.
- Adjust grid and snap settings: The grid helps you align and control precision in your CAD Drawing.
These small setup steps ensure your design remains accurate and consistent.
Step 3: Create Basic Geometry
Now it’s time to start drawing!
Use simple shapes like lines, circles, rectangles, and arcs to build your base design.
For example:
- Type LINE or click the line tool to draw straight lines.
- Use CIRCLE or ARC to draw curves or round edges.
- Use OFFSET or TRIM to fine-tune the shapes.
Each CAD command helps you create geometry faster and more precisely than traditional hand drafting.
Step 4: Use Layers to Organize Your Drawing
Layers are a vital feature in CAD software. Think of them as transparent sheets stacked on top of each other — each one containing a different part of your drawing.
For example:
- Layer 1: Walls
- Layer 2: Dimensions
- Layer 3: Electrical Layout
- Layer 4: Annotations
Using layers in your CAD Drawing helps you control visibility, color, and line types — making your project more organized and professional.
Step 5: Add Dimensions and Annotations
A drawing is incomplete without measurements.
Use the Dimension tool to label distances, angles, and diameters.
Annotations can include:
- Text labels (for part names or room numbers)
- Notes (for special instructions)
- Symbols (like arrows or welding marks)
Adding clear annotations ensures anyone reviewing your drawing understands the design intent without confusion.
Step 6: Apply Line Types and Thickness
Different line types represent different objects or functions:
- Solid lines for visible edges
- Dashed lines for hidden details
- Center lines for symmetrical parts
Adjusting line weights and colors gives your CAD Drawing a professional appearance and makes it easier to interpret.
Step 7: Check and Clean Up Your Drawing
Before finalizing, it’s important to check for:
- Overlapping lines or gaps
- Incorrect dimensions
- Misaligned parts
Use tools like OVERKILL or AUDIT (in AutoCAD) to clean and verify your drawing. A clean, error-free file ensures accuracy and professionalism.
Step 8: Save, Print, or Export Your CAD Drawing
Finally, save your project in multiple formats:
- .DWG or .DXF – Standard CAD formats for editing
- .PDF – For sharing or printing
- .STL or .STEP – For 3D modeling or manufacturing
Always save multiple backups of your work to prevent data loss. Once done, you can print your CAD Drawing or share it with clients, teachers, or collaborators.
Pro Tips for Beginners in CAD Drawing
- Learn shortcuts: Commands like
L(Line),C(Circle),M(Move), andTR(Trim) save time. - Use templates: Predefined templates speed up setup and ensure standardization.
- Practice regularly: The more you practice, the faster you’ll master CAD tools.
- Watch tutorials: YouTube and online courses offer visual guidance for beginners.
- Start simple: Begin with basic shapes before moving on to complex designs.
Conclusion
Creating your first CAD Drawing is an exciting milestone for any beginner. With the right software, organized workflow, and consistent practice, you can transform your ideas into precise digital blueprints.
Whether you’re designing a simple part or a complex architectural layout, CAD technology opens the door to endless design possibilities. So, fire up your CAD software, follow these steps, and start drafting your very first creation today!